Introduction
Tiling sits in the sweet spot of DIY: genuinely learnable, but punishing of overconfidence. A straight-lay bathroom floor is one of the most approachable skilled-trade projects a homeowner can take on. A curbless shower with large-format porcelain and a linear drain is not — that’s a job where a professional’s experience pays for itself many times over.
This guide helps you decide honestly which side of that line your project falls on. Get your quantities from the Tile Calculator first — the size of the job is the first input to the decision.
The Honest Cost Comparison
Start with money, because it’s the reason most people consider DIY. Using the cost guide figures for a 120 ft² (11.1 m²) porcelain bathroom floor:
| DIY | Professional | |
|---|---|---|
| Tile + setting materials | $525–$940 | $525–$940 |
| Tools (saw rental + consumables) | $150–$250 | $0 |
| Labor | $0 (your weekends) | $600–$1,440 |
| Total | $675–$1,190 | $1,125–$2,380 |
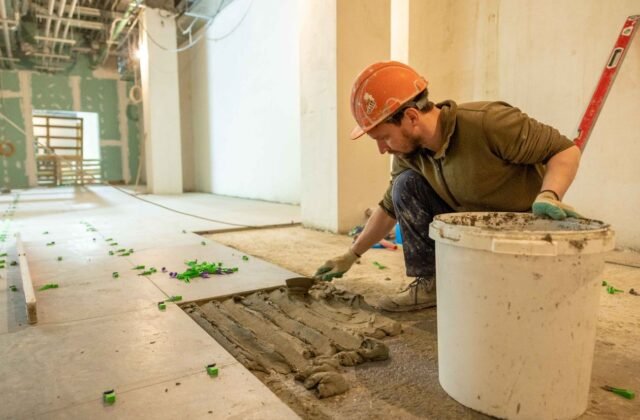
The DIY saving is real — roughly the labor line minus tool costs. But the table hides three costs: your time (a pro tiles that floor in 2–3 days; a first-timer needs 4–6), your breakage rate (pros break fewer tiles, so their waste allowance goes further), and rework risk (a failed DIY shower costs more than hiring a pro in the first place).
When DIY Makes Sense
- Straight-lay floors in simple rooms. Rectangular bathroom, laundry, or entry floors with 12 × 12 in (30 × 30 cm) ceramic or porcelain are the ideal first project — forgiving layout, manageable cuts, no waterproofing complexity.
- Backsplashes. Small area, vertical work at comfortable height, and mistakes are cheap (a box of subway tile costs little). The classic starter project.
- You own or can rent the tools. If the wet saw is already in the garage, the DIY math improves dramatically. First-job tool costs of $150–$350 are what make single small jobs borderline.
- The schedule is flexible. DIY tiling happens in evenings and weekends. If the bathroom can be out of commission for two weeks, fine. If it’s the only bathroom, hire out.
- The substrate is sound. Tiling over a flat, stable subfloor is straightforward. Subfloor repair, leveling, and structural work are where DIY projects go sideways — assess honestly before committing.
When to Hire a Professional
- Showers and wet areas. Waterproofing membranes, sloped pans, niches, and benches form an integrated system where one error causes hidden water damage. The stakes justify professional installation — and the code compliance guide explains why wet-area requirements are strict.
- Large-format tile (18 × 18 in / 45 × 45 cm and up). Heavy, hard to cut, demanding of substrate flatness, and requiring leveling systems and back-buttering. Pros do this daily; first-timers fight lippage on every tile.
- Natural stone. Expensive material, unforgiving of errors, needs sealing and white mortar, cracks on deflection that ceramic would survive. A broken $25/ft² marble tile hurts in a way a broken $2 ceramic doesn’t.
- Complex patterns. Herringbone, chevron, and intricate mosaics are slow even for pros. The labor premium reflects real difficulty, not markup.
- Structural or subfloor problems. Deflection issues, rotten subfloor, uneven slabs — fix the structure first, and that’s usually pro territory regardless of who sets the tile.
- Tight timelines. A pro crew tiles in days what takes a DIYer weeks. If the kitchen must function by Monday, the labor cost buys certainty.
The Hybrid Approach
The choice isn’t binary. Common splits that work well:
- DIY the floor, hire the shower. The highest-stakes surface gets a pro; the straightforward floor gets your weekends.
- DIY the demo and prep, hire the setting. Removing old flooring, hauling debris, and installing backer board are unskilled labor you can do well — and they reduce the pro’s billable hours.
- Hire for day one, DIY the rest. Some installers will set the critical first rows and the layout lines, then let you fill in. Ask — the worst answer is no.
Vetting an Installer: Questions to Ask
If you’re hiring, the cheapest quote is rarely the best value. Ask each candidate:
- “How do you waterproof showers?” Listen for a named membrane system (painted-on or sheet) per industry guidelines — not “the tile keeps water out.” Wrong answer here is disqualifying.
- “What’s your mortar coverage target under tile?” Pros know the standard: 80%+ coverage on floors, 95% in wet areas, achieved by back-buttering large format.
- “How do you handle lippage on large-format tile?” Expect mention of leveling clip systems and substrate flatness checks.
- “Can I see recent work, and can I contact a reference?” Photos are easy to borrow; a reference you can call is worth ten portfolio shots.
- “What’s your change-of-plane detail?” The right answer is silicone caulk at corners, not grout — see the common mistakes guide for why this matters.
- “Is demo, disposal, and subfloor prep in the quote?” Get the scope in writing. The most common billing dispute in tiling is “I thought that was included.”
Red flags: no waterproofing plan for a shower, willingness to tile over a visibly flexing floor, quotes dramatically below the others (something’s being skipped), no written scope, or pressure to decide immediately.
The Realistic DIY Timeline
| Phase | Pro timeline | First-timer DIY timeline |
|---|---|---|
| Demo + prep | 0.5–1 day | 1–2 days |
| Substrate + backer board | 0.5 day | 1 day |
| Layout + setting (120 ft² floor) | 1–2 days | 2–4 days |
| Cure wait | 1 day | 1 day |
| Grout + cleanup | 0.5–1 day | 1 day |
Plan for the DIY column, hope for better. The techniques that compress that timeline are in the pro tips guide — particularly working in small mortar sections and dry-laying the layout first.
Related Guides
- Cost Guide — the full budget breakdown for both paths.
- Pro Tips — techniques that make DIY results look professional.
- Common Mistakes — what goes wrong, DIY or pro.
- Code Compliance — requirements your installer (or you) must meet.
- Tiling Project Checklist — the sequence, whoever does the work.
Frequently Asked Questions
Is tiling a good first DIY project?
A backsplash or a small straight-lay floor, yes — they’re forgiving, and mistakes are cheap. A shower, no — waterproofing errors cause hidden damage that surfaces years later. Start small, build skill, then decide.
How much can I really save doing it myself?
Typically the labor line minus tool costs — on a 120 ft² floor, roughly $450–$1,200. The saving is largest on simple jobs where pro speed matters least, and smallest on complex jobs where pro skill matters most.
Should I buy my own tile if I’m hiring an installer?
Usually yes — you get the style you want at retail price, and most installers prefer it (they don’t want to warranty someone else’s material choice). But confirm quantities with the installer before ordering; their waste allowance for your specific layout may differ from the calculator’s default.
What if my DIY job goes wrong halfway?
Stop before the mortar cures on the bad section. A pro can usually rescue a job if the substrate is sound and the bad work is limited — it’s far cheaper to call one at the first sign of trouble than after grouting over mistakes. This is also why the checklist has verification steps between phases.
Decide Honestly, Then Commit
The right choice is the honest one: DIY the straightforward work where your time is the main cost, hire the high-stakes work where experience is the main protection. Either way, start with accurate quantities from the Tile Calculator — good numbers serve both paths.
Disclaimer: This guide offers general decision-making guidance, not professional advice. Project difficulty varies with site conditions and individual skill. Calculator results are planning estimates — verify quantities with your supplier, get written quotes from installers, and consult a qualified professional for structural, waterproofing, or code-related decisions.