Introduction
The difference between a tile job that looks professional and one that looks “DIY” rarely comes down to talent. It comes down to a few dozen small decisions — layout planning, ordering discipline, substrate prep, and pacing — that experienced installers make automatically and first-timers have to learn the hard way.
This guide collects the techniques that matter most, drawn from standard trade practice. Run your quantities through the Tile Calculator first, then use these tips to make sure the material you bought goes down well.
Planning and Layout Tips
Dry-lay before you mix anything
Lay out a row of tiles (with spacers) along the room’s longest dimension before spreading a single trowel of mortar. This reveals whether you’ll end with a sliver cut at the far wall — the classic amateur giveaway. If the last tile would be less than half a tile wide, shift the layout so the cuts fall evenly on both sides. Thirty minutes of dry-laying saves hours of regret.
Center the layout, don’t start in a corner
Snap chalk lines at the room’s center and work outward in quadrants. Corner-started layouts drift, and the far wall ends up with an uneven sliver. Centered layouts put equal cuts on opposing walls, which the eye reads as intentional and balanced.
Plan the cuts around the focal point
In a bathroom, the wall you see when you walk in is the show wall — put full tiles there and bury the cuts behind the toilet, under the vanity, or on the least visible wall. In a kitchen, the backsplash area behind the range gets the full tiles; cuts hide at the cabinet ends.
Mix tiles from multiple boxes
Even within one dye lot, shade varies slightly box to box. Pull tiles from 3–4 open boxes as you work, blending them across the floor. This averages out the variation instead of creating a visible “box boundary” halfway across the room.
Ordering and Material Tips
Buy everything in one order
Dye lots — the production batches tile is fired in — vary in shade. Two orders placed a month apart can be visibly different, even with the same SKU. The waste allowance from the complete guide (10–20% depending on layout) exists precisely so one order covers the whole job plus spares. The common mistakes guide shows what happens when people split orders to “save money.”
Keep the spares, don’t return them
That half-box left over after the job is the most valuable tile you own. Tile lines get discontinued constantly; in five years, a cracked tile is either a 20-minute swap from your attic stock or a re-tile of the whole floor. Store spares flat, indoors, labeled with the SKU and dye lot.
Buy the grout and mortar from the same trip
Setting materials are formulated to work as systems. Using one manufacturer’s polymer-modified thinset with another’s grout is usually fine, but buying the matched system removes a variable — and it means one trip if something’s missing. Check the material guide for which mortar suits your tile type.
Substrate Preparation Tips
Flat matters more than level
Tile doesn’t care if the floor slopes slightly; it cares about flatness. A hump or dip of more than 1/4 in over 10 ft (6 mm over 3 m) will crack tile or create lippage — edges that sit higher than their neighbors. Check with a long straightedge, not a short level, and grind high spots or fill low spots with self-leveling compound before tiling.
Never tile over questionable substrates
Tile bonded to a flexing or deteriorating substrate will fail no matter how good the installation. Plywood subfloors need the right thickness and fastening (deflection limits are covered in the code compliance guide); existing vinyl or laminate should generally come up. When in doubt, a cement backer board or uncoupling membrane over a sound subfloor is cheap insurance.
Waterproof wet areas properly
Showers, tub surrounds, and bathroom floors around the toilet need a waterproofing membrane — tile and grout are not waterproof. A painted-on membrane or sheet membrane behind/under the tile is standard practice per industry guidelines (TCNA). Skipping this step is the single most expensive mistake in bathroom tiling.
Installation Technique Tips
Back-butter large-format tiles
For tiles 18 × 18 in (45 × 45 cm) and larger, spread mortar on the substrate and flat-trowel a skim coat on the tile back. This collapses the trowel ridges fully and achieves the 80%+ mortar coverage (95% in wet areas) that prevents hollow spots and cracked tiles. It’s slower; it’s also what separates lasting installs from callbacks.
Use a tile leveling system on large formats
Clip-and-wedge leveling systems (installed at tile corners/edges, wedges tightened, clips snapped off after cure) virtually eliminate lippage on 24 × 24 in (60 × 60 cm) tile. At roughly $20–$30 per project, they’re the highest-ROI purchase in tiling. Small tiles don’t need them; large tiles practically demand them.
Work in small sections
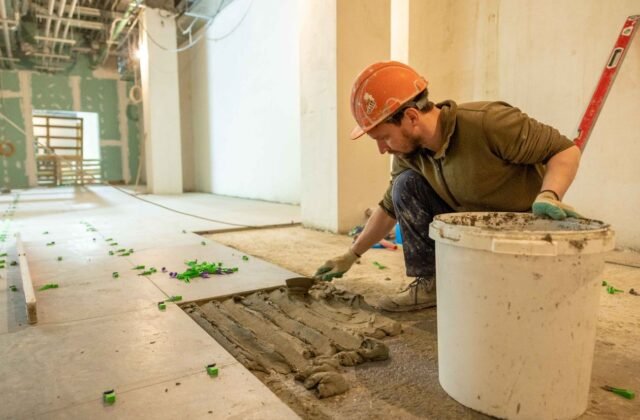
Spread only as much mortar as you can tile in 15–20 minutes — the open time before it skins over. Mortar that’s skinned won’t bond; tiles set in it sound hollow when tapped and eventually loosen. In hot or dry conditions, work even smaller sections.
Clean as you go
Wipe thinset off tile faces before it cures, and sponge grout haze off within the manufacturer’s window (usually 15–30 minutes). Cured thinset on a tile face requires a razor and patience; cured grout haze on textured tile can be nearly permanent. Keep two buckets: one for washing, one for rinsing.
Grouting and Finishing Tips
Wait for the mortar to cure before grouting
Grout too early and you disturb tiles that haven’t bonded — the standard wait is 24 hours for floors, longer for thick-bed or large-format work. Rushing this step is invisible on day one and obvious by month six, when grout cracks along the shifted tiles.
Seal what needs sealing, skip what doesn’t
Natural stone tile and cement-based grout benefit from sealer; glazed ceramic and porcelain generally don’t need tile sealer (the glaze is the sealer). Sealing unglazed tile that doesn’t need it wastes money; failing to seal marble or travertine invites staining. The material guide lists which materials need sealer.
Caulk the changes of plane, don’t grout them
Where tile meets tile at a corner (wall-to-wall, wall-to-floor, tub-to-wall), use 100% silicone caulk color-matched to the grout — not grout. Planes move independently with temperature and structural flex; grout cracks, caulk flexes. This one detail prevents the most common grout failure in showers.
Related Guides
- Tile Calculator Complete Guide — quantities and formulas behind every tip here.
- Common Mistakes — what goes wrong when these tips are skipped.
- Tile Material Guide — mortar, grout, and membrane selection.
- DIY vs Pro — which of these techniques signal it’s time to hire out.
- Tiling Project Checklist — the step-by-step sequence in order.
Frequently Asked Questions
What’s the single most important pro tip for a first-time tiler?
Dry-lay the layout before mixing mortar. Most first-timer disasters — sliver cuts, drifting rows, mismatched cuts at focal points — are layout problems, and layout problems are free to fix before mortar is involved and expensive after.
Do I really need a tile leveling system?
For 12 × 12 in (30 × 30 cm) and smaller, no — careful trowel work suffices. For 18 × 18 in (45 × 45 cm) and larger, strongly recommended; the clips cost little and eliminate the lippage that even experienced installers fight on big tiles.
How long should I wait before grouting?
Typically 24 hours after setting floor tile, longer for large-format or thick-bed installations. The mortar manufacturer’s data sheet gives the exact figure — follow it, not the urge to finish in one weekend.
Can I tile directly over existing tile?
Sometimes, if the existing tile is sound, well-bonded, and the added height doesn’t cause problems at doors and transitions. It requires proper surface prep and the right mortar. But it’s a compromise — removing the old tile and starting from a proper substrate is the more reliable route.
Tile Like You’ve Done It Before
None of these tips require special talent — they require patience and sequence. Plan the layout dry, prep the substrate flat, order everything at once, set in small sections, grout after full cure, and caulk the corners. Run your numbers through the Tile Calculator, work through the project checklist in order, and the job will look like you hired it out.
Disclaimer: These tips reflect standard trade practice for planning purposes. Every substrate and product is different — follow your mortar, grout, and membrane manufacturers’ instructions, and consult a qualified professional for structural, waterproofing, or code-related decisions. Calculator results are planning estimates; verify quantities with your supplier.