Introduction
Note: this is a hypothetical, illustrative example — a fictional project walked through end to end to show how slab estimating works in practice. It is not a real client project and the figures are worked examples, not quoted prices. The Concrete Slab Calculator produces the volume at the heart of this walkthrough; everything around it shows the decisions a real project would require.
Open the Concrete Slab Calculator
The Hypothetical Project
A homeowner wants a 20 × 12 ft concrete patio, 4 in thick, behind a suburban house — foot traffic and patio furniture only, no vehicles. The yard is flat, the soil is firm clay, and the local climate sees winter freezes. The goal: a broom-finished patio with proper drainage, built to last.
Step 1: Measurement and Site Prep
Forms go up first: 2×4 lumber staked every 2–3 ft, inside dimensions verified at 20 ft × 12 ft at both ends. The base is excavated to firm soil, then 4 in (10 cm) of crushed stone is placed in two 2-in lifts, each compacted with a plate compactor. Depth is checked at a dozen points: a consistent 4 in from compacted base to top of form.
Drainage slope is built into the forms: 1/4 in per foot away from the house along the 12-ft dimension — 12 × 0.25 = 3 in of total fall, invisible to the eye, decisive for runoff. The measurement method follows the estimating guide step by step.
Step 2: The Volume Estimate
Running the numbers through the calculator’s logic:
Thickness: 4 ÷ 12 = 0.3333 ft. Geometric volume: 20 × 12 × 0.3333 = 80 ft³. Waste (10%): 80 × 1.10 = 88 ft³. Cubic yards: 88 ÷ 27 = 3.26 yd³. Bags: 88 ÷ 0.6 = 146.67 → 147 eighty-pound bags.
Metric cross-check: 6.10 m × 3.66 m × 0.1016 m = 2.27 m³; × 1.10 = 2.49 m³; ÷ 0.017 = 146.5 → 147 bags. Both systems agree.
The delivery decision: 147 bags at $6.50 = $955 in concrete alone, plus a brutal mixing day. A 3.5-yd³ short-load of ready-mix at ~$160/yd³ = $560 plus a ~$100 short-load fee = $660 — cheaper and one consistent mix. The project orders 3.5 yd³ of 3,500 PSI air-entrained concrete (air-entrained for the freeze-thaw winters). Delivery economics like this are compared in the cost guide.
Step 3: The Materials List
| Material | Quantity (calculated) |
|---|---|
| Ready-mix concrete, 3,500 PSI air-entrained | 3.5 yd³ (from 3.26 computed) |
| Crushed stone base, 4 in deep | 240 ft² × ⅓ ft = 80 ft³ = 2.96 yd³ ≈ 4.1 tons |
| Wire mesh sheets 5 × 10 ft | 240 ÷ 50 = 4.8 → 5 sheets, lapped 6 in |
| 2×4 form lumber + stakes | 64 lineal ft of perimeter + stakes |
| Curing compound / plastic sheeting | 240 ft² coverage |
| Penetrating sealer (after 28 days) | ~1–2 gallons (200–300 ft²/gal) |
Mesh goes on chairs to sit mid-slab — the reinforcement comparison in the material guide explains why placement matters more than the steel itself.
Step 4: The Illustrative Budget
| Item | Illustrative cost |
|---|---|
| Concrete 3.5 yd³ delivered (incl. short-load fee) | $660 |
| Crushed stone, 4.1 tons delivered | $185 |
| Wire mesh, 5 sheets | $100 |
| Form lumber and stakes | $120 |
| Plate compactor rental (1 day) | $75 |
| Curing materials + sealer | $60 |
| Total materials | ≈ $1,200 |
These are illustrative figures, not quotes — but the structure is what matters: concrete is roughly half the material cost, and the base, steel, and forms make up the rest. A contractor turnkey price for this patio would run roughly $1,900–$2,400 (240 ft² × $8–$10), which frames the DIY saving at around $700–$1,200 for a weekend of hard work.
Step 5: Pour-Day Sequence
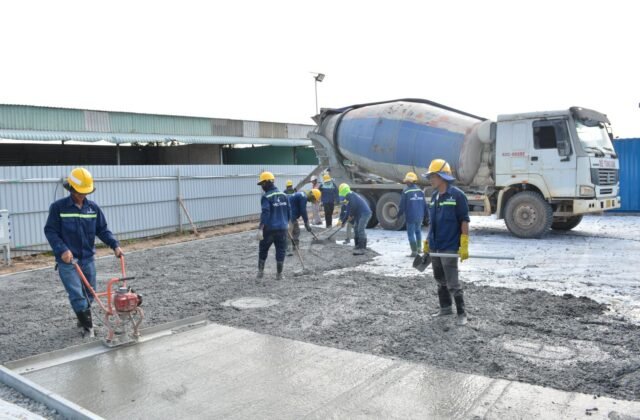
Morning pour, full crew briefed before the truck arrives: dampen the base, confirm the 3-in fall with a level, pull mesh up on chairs as concrete advances, screed immediately behind placement, bull-float once, then wait for bleed water to evaporate before brooming. Control joints: one joint each way dividing the patio into 10 × 6 ft panels (within the 8–12 ft spacing rule for 4-in slabs), cut 1 in deep — tooled while plastic or sawed within hours. Edges finished with an edger. The full sequence is itemized in the pour-day checklist, with timing judgment in the pro tips guide.
Step 6: Curing and After
Curing compound applied right after finishing (or plastic sheeting laid down), kept in place 7 days. Foot traffic after 48 hours; furniture after a week; penetrating sealer at 28 days. The patio then needs nothing but occasional cleaning — the payoff of a compacted base, correct thickness, timely joints, and a proper cure.
Takeaways From the Example
- The volume decides the delivery method — 3.26 yd³ made ready-mix the obvious call over 147 bags.
- Thickness was verified, not assumed — a dozen tape checks before ordering.
- Every number was cross-checked — metric against imperial, supplier quote against the calculator.
- The budget’s structure matters more than its exact figures — concrete ~half, base/steel/forms the rest, labor the DIY saving.
Related Guides
- Estimating Guide — step-by-step slab measurement.
- Slab Cost Guide — concrete, base, forms, labor, and finishes priced out.
- Pour-Day Checklist — everything to verify before the concrete arrives.
- Complete Slab Guide — the full walkthrough of slab estimating.
- Pro Tips for Slabs — base prep, screeding, joint timing, and curing.
Run Your Own Numbers
This example was hypothetical, but the method is real: measure the forms, verify thickness, compute volume, add waste, choose delivery, price materials, and cure patiently. Run your project through the Concrete Slab Calculator and walk it through these same six steps — your slab deserves the same rigor this fictional one got.
Disclaimer: This case study is a hypothetical, illustrative example — not a real project, and figures are worked examples, not quotes or guarantees. Calculator results are planning estimates based on the dimensions you enter. Verify volumes and prices with local suppliers, check local building codes for thickness and setback requirements, and consult a licensed professional for structural or code-related decisions.