Introduction
There’s a gap between knowing how much mulch you need and getting a job that looks like a professional did it. The arithmetic is the easy part — the Mulch Calculator handles the volume in seconds. This guide covers what the calculator can’t tell you: how to order smart, what to check at delivery, how to spread for a clean finish, and the seasonal timing that makes mulch last longer.
Think of it as the experienced-neighbor advice that usually comes with the wheelbarrow: the judgment calls around the number. The fundamentals — terminology, formulas, and a worked example — are in the complete guide.
Ordering Like a Pro
Order slightly more than the math says, in one delivery. The calculator’s waste allowance covers losses, but a second small delivery costs a second delivery fee and risks a color mismatch between batches. If your estimate lands at 2.4 yards, ordering 2.5 or 3 in one trip is cheaper and safer than 2.4 now and a rescue yard later.
Call the supplier, don’t just order online. Ask three questions: is the cubic yard a true 27 ft³ (some “yards” are heaped, some level)? Is the material fresh or aged (fresh shredded bark can heat up and is rougher to handle)? And what’s the dumping situation — can the truck reach your beds, or will you be wheelbarrowing from the driveway? A cubic yard is roughly 10–15 wheelbarrow loads; a 6-yard delivery dumped 50 ft from the beds is a full day of hauling.
Schedule delivery a day or two before spreading day, not the same morning. Deliveries run late, trucks get stuck, and mulch dumped on a wet lawn ruts the grass. A driveway or tarp is the ideal landing zone — never dump bulk mulch directly on lawn you care about; the pile kills the grass underneath within days.
For pricing tactics — three-quote shopping, neighborhood splits, off-season timing — see the cost guide.
Bed Preparation: The Step Everyone Skips
The best-spread mulch on a poorly prepared bed still looks bad. Before the mulch arrives:
- Edge the beds. A clean cut edge (spade-cut or installed edging) keeps mulch in and lawn out, and it’s what separates an amateur look from a professional one. Cut a shallow trench along the border so mulch has somewhere to sit instead of spilling onto the lawn.
- Weed thoroughly. Pull existing weeds by the root — mulch suppresses new weeds but doesn’t kill established ones. This is also the moment for pre-emergent herbicide if you use it.
- Water the soil. Moist soil under the mulch holds moisture far longer. If the ground is bone dry, soak it before spreading.
- Decide on landscape fabric. Fabric is optional and divisive: it blocks weeds initially but degrades, makes planting later harder, and decomposed mulch can’t enrich the soil through it. For planting beds, most professionals skip fabric and rely on depth; for stone mulch or paths, fabric is more justifiable. See the material guide for the trade-offs.
Spreading Technique
Work in sections. Dump or distribute piles around the bed first, then rake out. Trying to spread from one end of a long bed means the far end gets thin coverage and the near end gets buried.
Use a rake, not your hands. A bow rake or landscape rake moves mulch far faster and more evenly than hand-spreading. Flip the rake head over for the final smoothing pass — the flat back of the head gives a level finish.
Check depth as you go. Stick a ruler or marked stake in the bed periodically. It’s remarkably easy to spread 4 inches where you wanted 3 — and at $40+ a yard, that extra inch across a whole bed is real money. Depth mistakes are also the #1 estimating error; the common mistakes guide covers the rest.
Keep mulch off the plants. Pull mulch back 2–3 in (5–7.5 cm) from trunks, stems, and the base of shrubs — the “donut, not volcano” rule. Mulch piled against bark holds moisture against tissue that isn’t designed for it, causing rot and inviting pests. Around new plantings, keep the root flare visible.
Feather the edges. Taper the mulch thinner at bed edges and against lawn so it doesn’t spill over, and so the edging trench does its job.
Timing and Seasonal Tips
Spring is the classic window — beds are clean from winter, and mulch goes down before weeds germinate. But late winter or early spring (before peak season) often means better supplier availability and shorter delivery lead times.
Don’t mulch frozen or waterlogged soil. Mulch insulates — on frozen ground it delays thaw and spring warm-up; on saturated ground it prolongs sogginess. Wait for workable soil.
Top-dress annually. Organic mulch decomposes roughly 1–2 in per year. A 1–2 in refresh each spring (half the original depth) maintains the look and the weed barrier at a fraction of the install cost — and it’s the cheapest mulch you’ll ever buy, since the bed prep is already done. Set a recurring reminder; the beds that look perpetually sharp are simply the ones that get topped up on schedule.
Consider a fall application for winter protection. A fresh layer in late fall insulates roots against freeze-thaw cycles. It’s optional in mild climates but valuable where winters are harsh.
Working With Different Materials
- Shredded bark: knits together and resists washing — spread it slightly thinner on slopes since it mats well. Water it in after spreading to help it settle.
- Bark nuggets: float in heavy rain and migrate on slopes; better for flat beds. They spread fast because they’re chunky — don’t over-order.
- Pine straw: apply by hand in “shakes” rather than dumping; it fluffs up enormously, so the settled-depth rule matters most here. Tuck the edges under for a clean line.
- Wood chips: coarse and slow to break down; keep fresh chips off the soil surface of nitrogen-hungry plantings, since decomposing wood can temporarily tie up nitrogen at the soil interface.
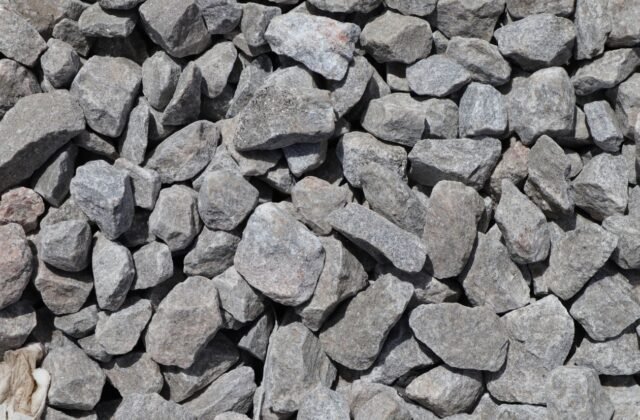
- Stone/gravel: a one-time install — get the depth right the first time (usually 2–3 in over fabric). Moving stone later is miserable, so over-preparation beats rework.
Related Guides
- Mulch Calculator: Complete Guide — terminology, formulas, and the worked example.
- Common Mistakes — the errors that ruin estimates and finishes.
- Mulch Material Guide — types, depths, and which material suits which bed.
- Cost Guide — bulk vs bagged pricing and delivery fees.
- Mulching Checklist — everything to verify before the mulch arrives.
- Estimating Guide — measuring techniques for every bed shape.
Get Your Number
Professional results come from sequence, not strength: measure and estimate with the Mulch Calculator, order in one delivery with a small buffer, prep the beds before the truck arrives, spread with a rake checking depth as you go, and keep mulch off the trunks. Do that, and the finished beds will look like someone charged $500 for them — because the technique is the same.
Disclaimer: Calculator results are planning estimates based on the dimensions you enter. Actual mulch requirements vary with site conditions, bed preparation, material compaction, and supplier fill. Verify volumes with your supplier and consult a landscaping professional for drainage, grading, or structural decisions.